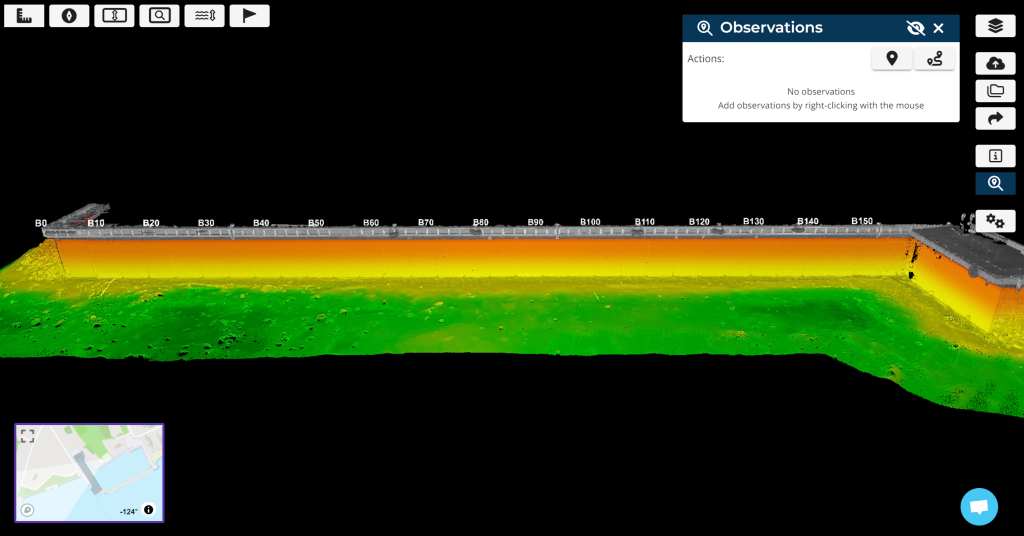
Observations
Observations can be used by surveyors as a tool to direct attention towards a specific point or area within the dataset. The added observations are automatically gathered into the report. You can select the type and severity of the observation. The observations placed before a chainage is made will automatically be added to the respected chainage upon creation.
Contents
Add observation
You can add Point or Line observations. Observation allows the user to examine and draw attention to a specific point or line in the dataset.
In the 3D view, open Observations from the righ-side menu and select Point or Line observation icon from the actions. Pick points for the observations by clicking on the dataset.
You may also place an observation by right-clicking directly on the dataset
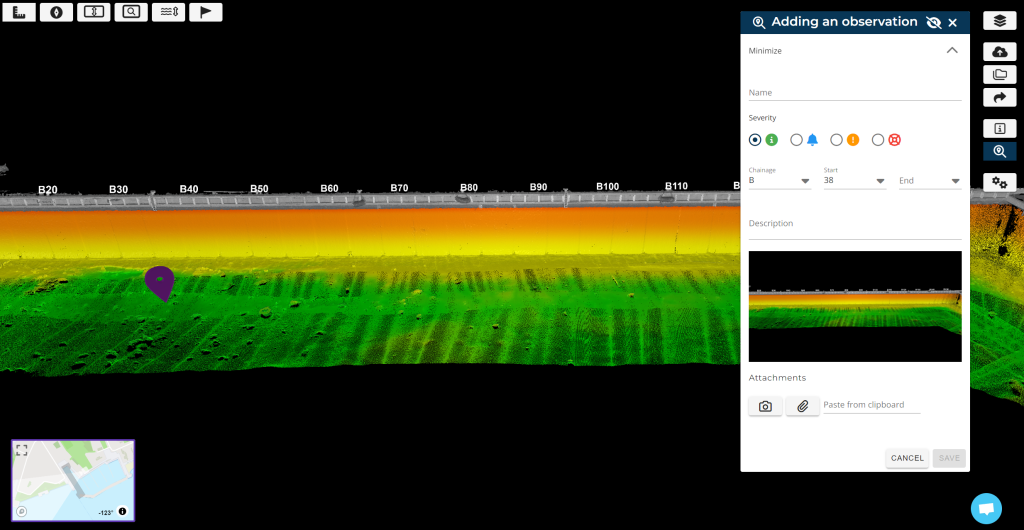
Enter observation info
Enter details regarding the observation:
- Give a name for the observation
- Choose the Severity of the observation from the classifications (Info, Slight, Significant, Severe)
- Add a description of the observation
- Add images or other attachments
The location of the observation will be filled by default if you have a chainage
Add screenshots and images
- Click the camera icon to add a screenshot from the current view to observation or click the attachment icon to add an image from your files. You can also just paste an image copied on your clipboard to the open field!
- Add a name when attaching the image or screenshot
Change the order of images by clicking and dragging the image up or down.
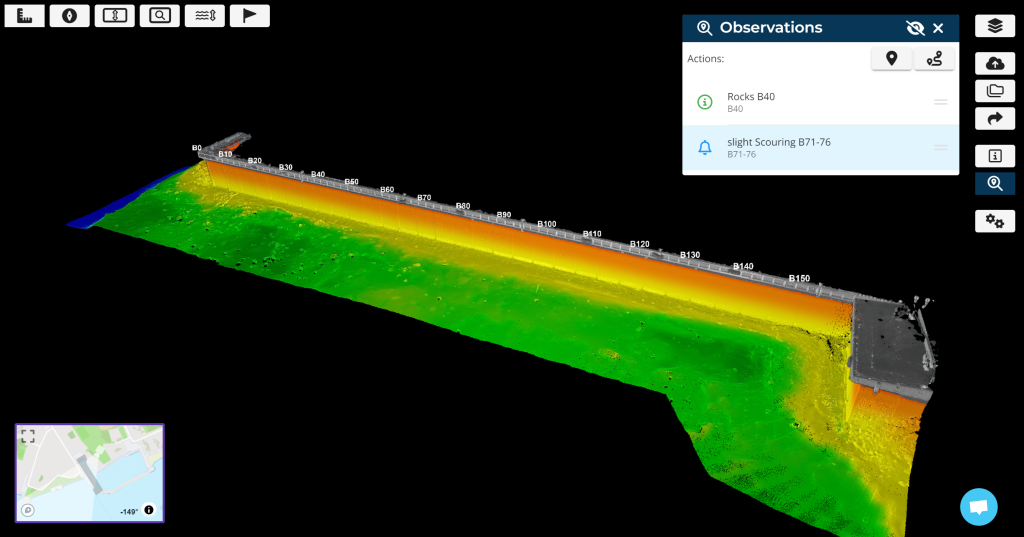
Edit observation
Click the Observations icon from the right-side menu to see all observations added to the dataset. Click on the observation you want to edit and modify info and add images or delete the observation. Change the order of observations by clicking and dragging the observation up or down.
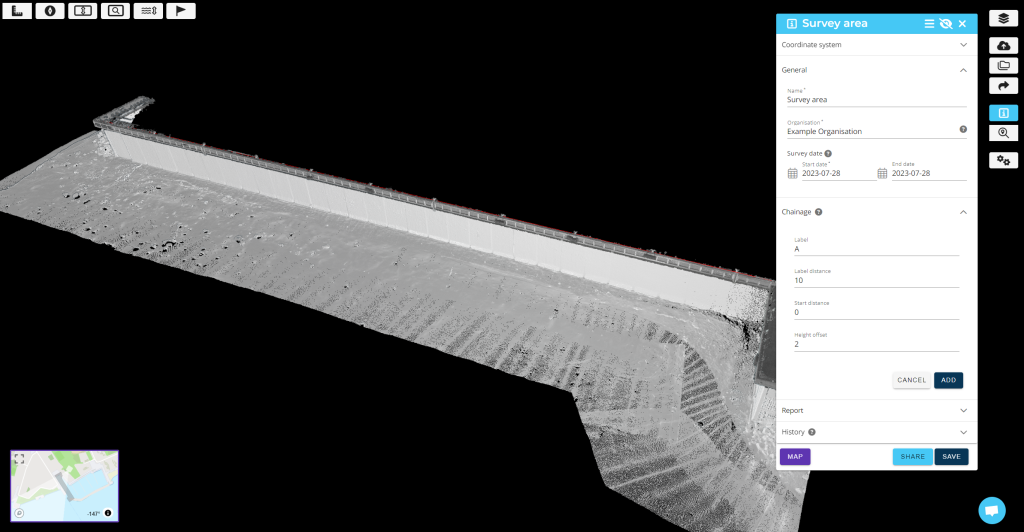
Add chainage
Adding chainage allows observations to be linked to a certain location in a dataset. If you add a chainage after you have added observations, the observations will be automatically linked to the added chainage.
Add chainage (in meters) to your survey area using this feature in the 3D view:
- Open the Chainage tab from dataset info panel
- Activate the chainage tool by clicking the + button
- Select points in the dataset according to the desired chainage
- Hold Shift to end line
To make exact vertical or horizontal perpendicular chainage, hold the Ctrl key as you click, hold the Shift key to end the chainage.
Fill in the details:
- Label: Identification for the chainage. Can only contain lower/uppercase letters (A-Z)
- Label distance: Distance between two labels
- Start distance: Starting number of the chainage
- Height offset: Distance above the selected points in the dataset
To edit or delete a chainage, click on the edit icon. You can change everything except for the label distance.
If you don’t see the added chainage in dataset, please check if Chainages are set to be visible via layers.